In a previous series of posts (part 1, part 2), hands on experience with the Azure IoT Suite was discussed. In this post, we will show how to generate network traffic on your IoT solution. We will do this by generating data with IoTIFY’s Network Simulator and sending it to the Azure IoT Hub. This is particularly useful if you want to easily test your solution in the absence of real sensors or if you want to quickly simulate a lot of devices at once.
In order to follow along with this post, it is important that you have an IoTIFY account. You can sign up for a free account here.
There are two things we need to know before we can start setting up our network simulations. First, the credentials of a device to connect to the Azure IoT Hub. Second, the actual message structure of the simulated device to be sent to the IoT Hub. Let’s begin with the first one.
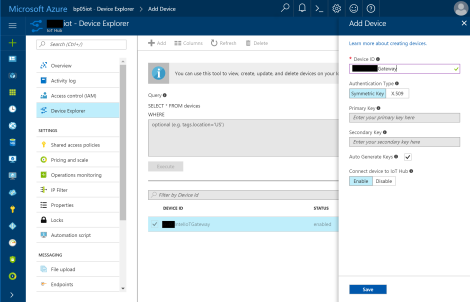
Go to the Azure Portal and visit your IoT Hub. Click Device Explorer > Add. Fill in a unique ID for your device and save the settings (see figure below).
Once the device is setup, we can use the Device Twin Explorer to retrieve a SAS (Share Access Signature) token that will be used later to connect the device to the IoT Hub. In the management tab you have an overview of the different devices. Select your device and click the SAS Token button. A dialog appears where you again need to select the correct device as well as a Time-To-Live (TTL) for your token. Click the Generate button and your token will appear.

For the actual message structure, we will visit our Intel IoT gateway and go to the Node-RED environment. Double click the Create Payload element in the flow. Here we can see the actual structure of the message we are sending to our IoT Hub. Record this for future reference.
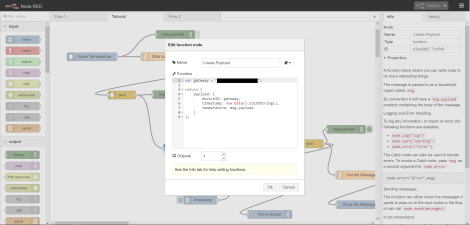
It is a simple structure with only three elements:
{ "deviceId": "client0", "timestamp": "08/18/2017 12:46 PM", "temperature": 36 }
Please note that the above step can be very different in your setup. The way described here assumes you have followed the previous posts as well.
Next, we can start creating our simulations using the IoTify service. Go to the IoTify website and login using your account. In your network tab, you should see something like the following:
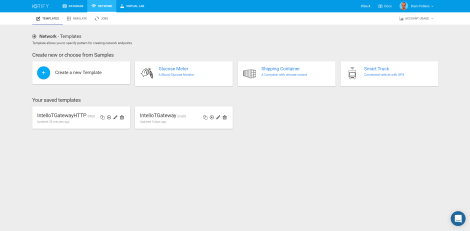
Templates are the mechanism used by IoTify for simulating your device. Several samples have been provided to you. However, we will create two templates of our own. One is using the MQTT protocol and one is using the HTTP REST protocol.
MQTT Template
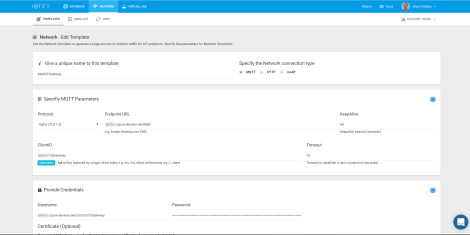
Create a new template and you should see something similar as the figure above. Next, fill in the blanks concerning MQTT parameters and credentials as follows:
- Connection type: MQTT
- Protocol: mqtts (TLS 1.2)
- Endpoint: .azure-devices.net:8883 (replace with the name of your IoT Hub).
- Client ID: (replace with the ID of the device created above)
- Credentials:
- Username: .azure-devices.net/
- Password : Everything that comes after ‘SharedAccessSignature=’ in the SAS Token generated above (see underlining in the figure x).
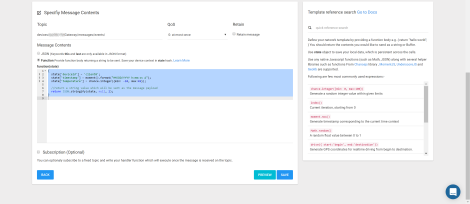
In the “Specify Message Contents” section we will specify the topic endpoint as well as the message structure.
- Topic: devices//messages/events/
- Message Contents : A JavaScript function body returning the actual message. This is the same structure as the one determined above. The message basically contains a device id, a timestamp and a temperature. Numerous expressions can be used to specify this message. Here we opted for a timestamp representing current time and a randomly generated temperature between -10 and 45 degrees Celsius.
HTTP Template
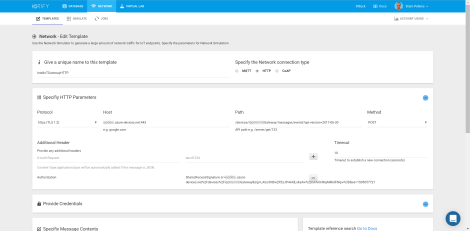
Again create a new template and you should see something similar as the figure above. Next, fill in the blanks concerning the HTTP parameters as follows:
- Connection type: HTTP
- Protocol: https (TLS 1.2)
- Host: .azure-devices.net:443 (replace with the name of your IoT Hub).
- Path: /devices//messages/events?api-version=2017-06-30
- Method: POST
- Additional Header:
- Create a new Authorization header with as value everything that comes after ‘SharedAccessSignature=’ in the SAS Token generated above (see underlining in the figure x).
Note: In other blog posts, I have seen people ask about how to retrieve the actual API version. You could use the date that is provided in the documentation. At the time of writing this one says “2016-02-03”. I have retrieved mine from the source code of the Node.js SDK for connecting devices to the Azure IoT Hub (which is available on GitHub). This also worked for me!
In the “Specify Message Contents” section we will specify the message structure in the same way as the we did for the MQTT template.

Simulations
Next, we can start building our simulations. State the number of clients that you want to initialize as well as how many times you want them to repeat sending a message.

Additionally, you can apply a number of network parameters to make your simulation better resemble real-life network conditions e.g. average delay, jitter,… You can do all this using predefined templates as well.
One important thing to note about the simulations is that in the case of MQTT connections IoT Hub only supports one active MQTT connection per device. New MQTT connections using the same credentials will result in dropping the existing connection. In terms of performing simulations using the MQTT protocol this resulted in on average 50% success rate for our simulations (i.e. using 1000 clients through the same device credentials). Performing the same simulation using the HTTP protocol resulted in a 100% success rate.
Conclusion
In this blog post, we covered running simulations on our IoT solution, i.e. IoT Hub, using the IoTify service. We made the connection between IoTify and IoT Hub using the MQTT and HTTP protocol.
